How to use Git & Github intuitively
A visual guide to understanding Git and Github workflows for beginners.
Git & Github: A Visual Guide
Best tutorial video: Git and GitHub for Beginners by Kunal Kushwaha
Understanding Git: The Visual Way
Think of Git as a time machine for your code. Let’s visualize the key concepts:
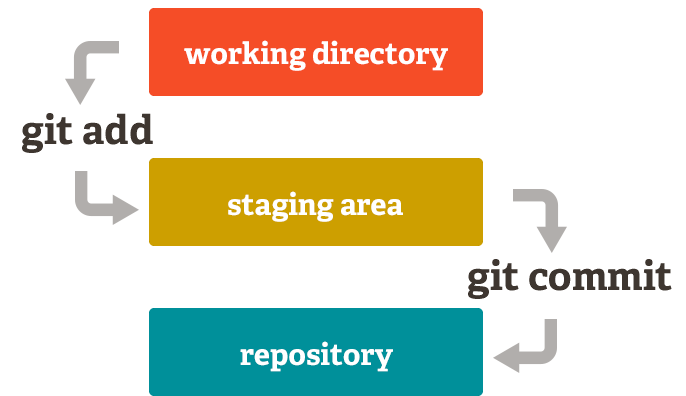 The basic Git workflow showing working directory, staging area, and repository
Setting Up Your Environment
Creating a Repository on Github
Think of a repository (repo) as a project folder that Git tracks. When you create a repository on GitHub, you’re essentially creating a storage space in the cloud.
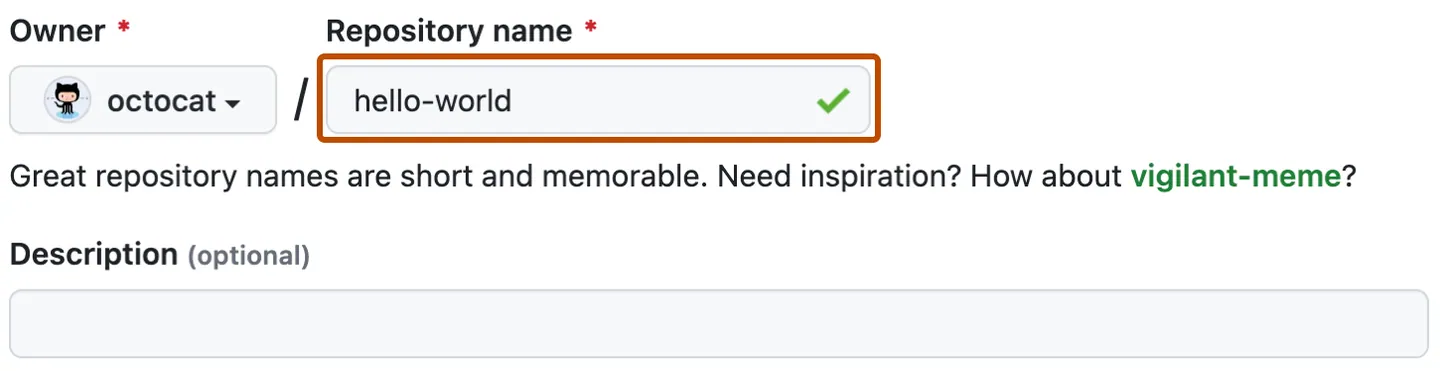 Creating a new repository on GitHub
Navigating with the Terminal (cd)
Before we can work with Git locally, we need to navigate to the right location on our computer:
1
2
3
4
5
6
7
8
9
10
11
# Change to a specific directory
cd path/to/your/folder

# Go up one level
cd ..

# Go to home directory
cd ~

# Show current directory
pwd
Setting Up a Local Repository
Now we need to create a local repository on our computer that will connect to the GitHub repository.
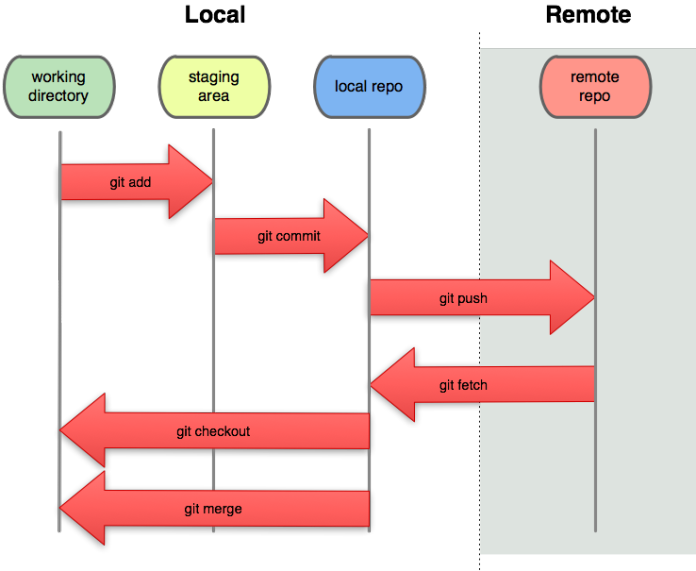 Relationship between local and remote repositories
Basic File Operations
These commands help you manage files in your repository:
1
2
3
4
5
6
7
8
9
10
11
12
13
14
15
16
17
18
19
20
# Create a new folder
mkdir project-name

# List all files and folders
ls
# Detailed list with permissions and dates
ls -la

# Create a new empty file
touch README.md

# Write content to a file (creates if doesn't exist)
echo "# My Project" > README.md

# Edit a file with vim
vi README.md
# (Press 'i' to enter insert mode, ESC to exit insert mode, :wq to save and quit)

# View file contents
cat README.md
Core Git Operations
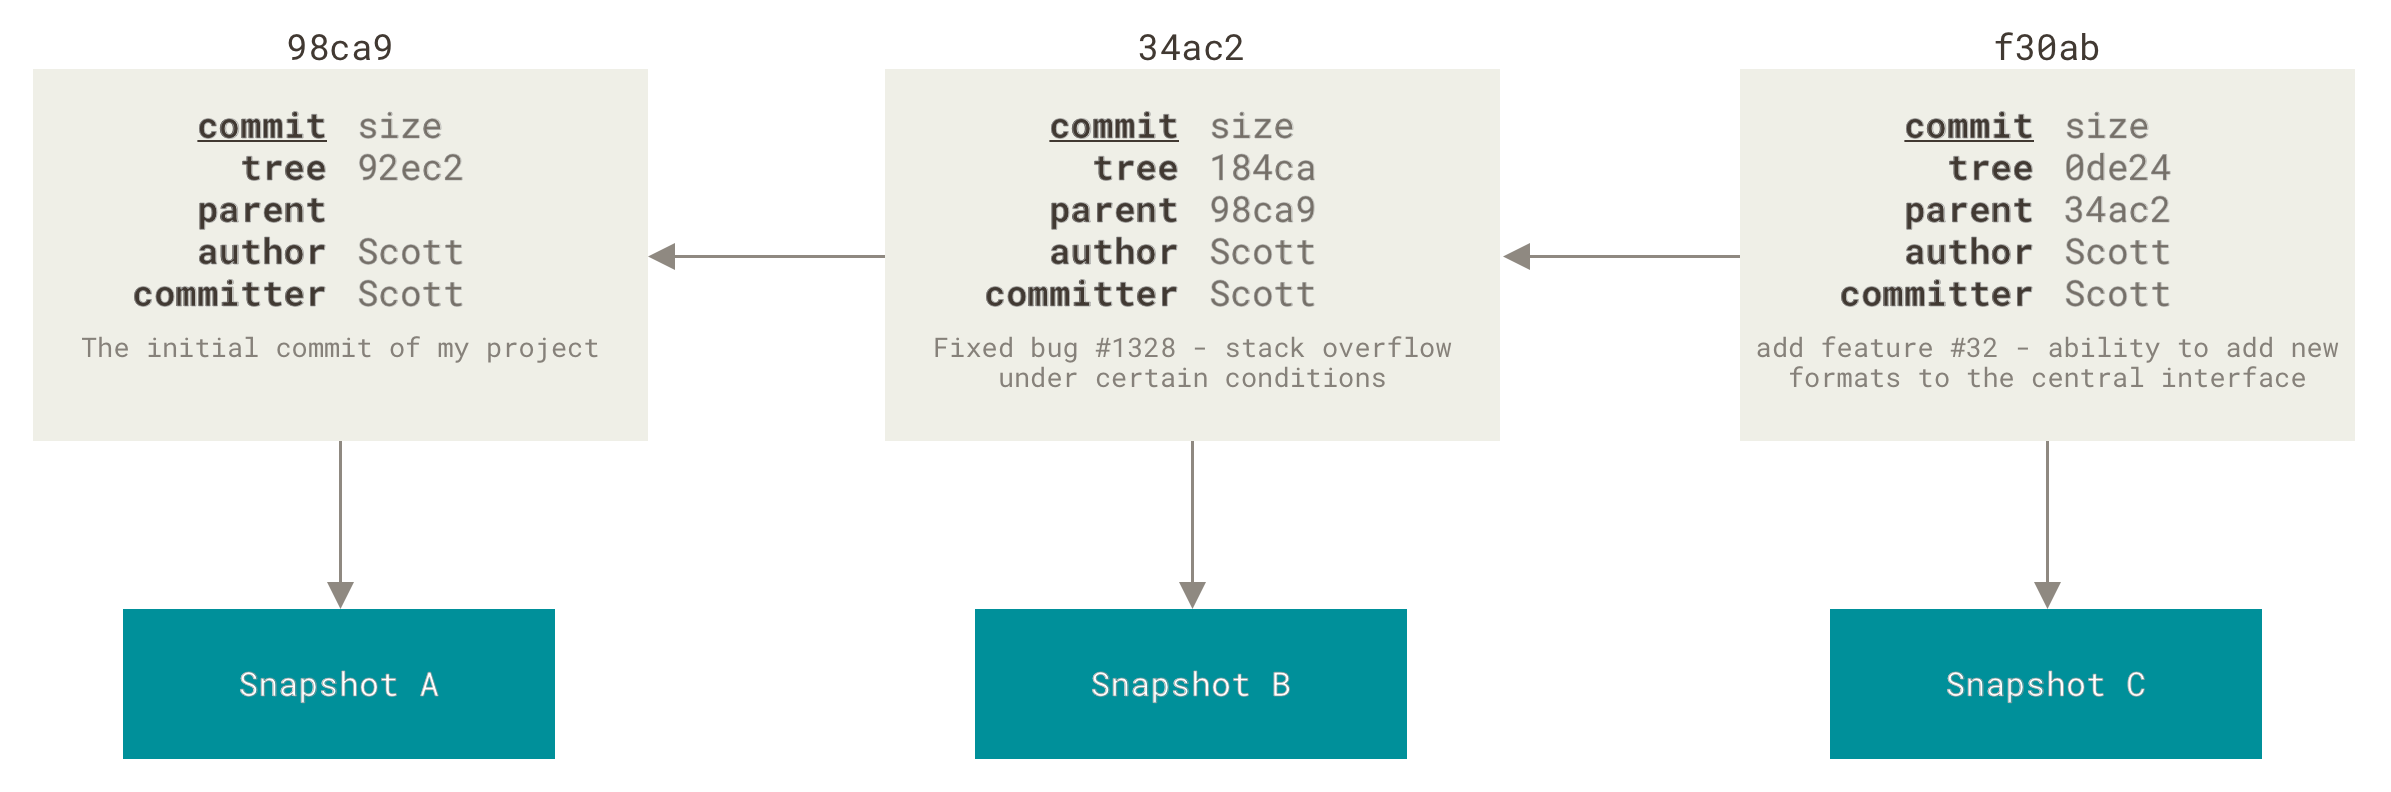
Tracking Changes
Think of Git as taking snapshots of your project over time. Each snapshot (commit) captures the state of all files.
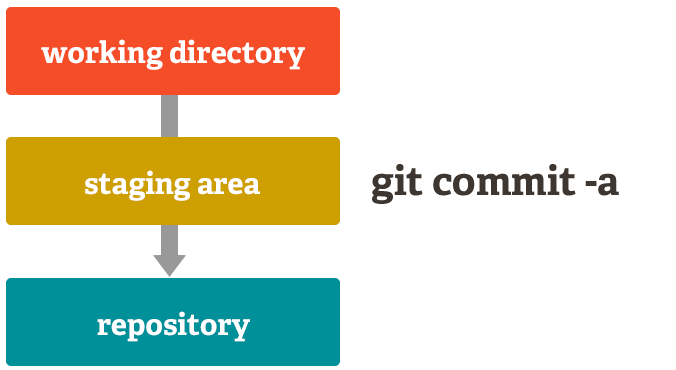 Visual representation of staging and committing changes
1
2
3
4
5
6
7
8
9
10
11
12
13
14
15
16
17
18
19
20
# Initialize a new Git repository
git init

# Check repository status (what's changed)
git status

# Add files to staging area (preparing for commit)
git add filename.txt      # Add specific file
git add .                 # Add all files

# Commit changes with a message
git commit -m "Add initial files"

# View commit history
git log
git log --oneline         # Compact view

# Reset to a previous commit (be careful!)
git reset commit_hash     # Soft reset (keeps changes as unstaged)
git reset --hard commit_hash # Hard reset (discards changes)
Managing Files
1
2
3
4
5
6
7
8
9
10
11
# Remove file from staging area only (keeps the file)
git rm --cached filename.txt

# Remove file completely
git rm filename.txt

# Restore file from staging area (unstage)
git restore --staged filename.txt

# Restore changes in working directory (discard changes)
git restore filename.txt
Stashing Changes
Stashing is like putting your changes in a drawer for later use:
1
2
3
4
5
6
7
8
9
10
11
12
13
14
# Save changes temporarily without committing
git stash

# Apply the most recent stash and remove it
git stash pop

# List all stashes
git stash list

# Apply a specific stash
git stash apply stash@{n}

# Clear all stashes
git stash clear
Connecting to GitHub
After creating repositories locally and on GitHub, you need to connect them:
 Connecting local repository to GitHub remote
1
2
3
4
5
6
# Connect to a remote repository
git remote add origin https://github.com/username/repository-name.git

# Push changes to GitHub
git push -u origin main   # First time push
git push                  # Subsequent pushes
Branching
Branches let you develop features in isolation. Think of them as parallel timelines:
 Visualization of Git branches as parallel timelines
1
2
3
4
5
6
7
8
9
10
11
12
13
14
# List all branches
git branch

# Create a new branch
git branch feature-name

# Switch to a branch
git checkout branch-name

# Create and switch to a new branch in one command
git checkout -b new-branch-name

# Merge a branch into current branch
git merge branch-name
Collaboration Workflow
When working with others, you’ll use these operations:
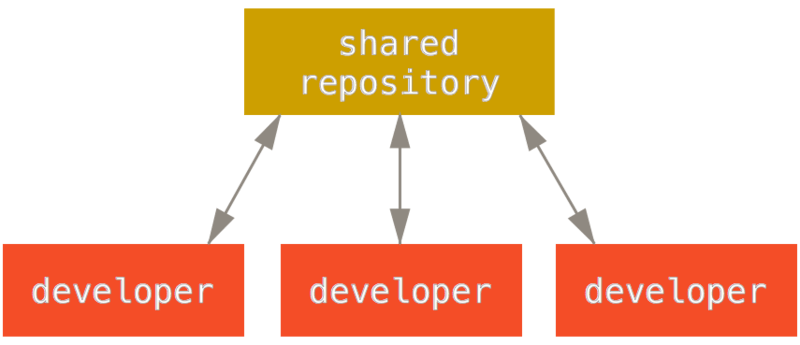 Visual representation of the collaboration workflow
1
2
3
4
5
6
7
8
9
10
11
12
13
14
15
# Fork a repository (done on GitHub UI)
# This creates your own copy of someone else's repository

# Clone a repository to your local machine
git clone https://github.com/username/repository-name.git

# Add original repository as upstream (for syncing)
git remote add upstream https://github.com/original-owner/repository-name.git

# Fetch updates from upstream
git fetch upstream

# Merge upstream changes into your local main branch
git checkout main
git merge upstream/main
Advanced Operations
Rebasing
Rebasing is like rewriting history. It helps maintain a clean commit history:
 Before and after visualization of rebasing commits
1
2
3
4
5
6
7
8
# Interactive rebase to modify commit history
git rebase -i HEAD~3  # Modify last 3 commits

# During interactive rebase you can:
# - 'pick' - keep the commit as is
# - 'squash' or 's' - combine with previous commit
# - 'reword' or 'r' - change commit message
# - 'drop' - remove the commit
Resolving Conflicts
Conflicts happen when Git can’t automatically merge changes:
 Visual representation of a merge conflict
To resolve conflicts:
- Open the conflicted files (look for
<<<<<<<,=======,>>>>>>>markers) - Edit the files to resolve conflicts
- Add the resolved files (
git add .) - Complete the merge (
git commitor continue rebase withgit rebase --continue)
Best Practices
Why Create a New Branch for Each Feature?
Creating a separate branch for each feature is like having different workspaces for different tasks:
 Visualization of multiple features being developed on separate branches
Benefits:
- Each Pull Request represents one feature, making code review focused
- Teams can work in parallel without stepping on each other’s code
- Issues can be isolated and fixed without affecting other features
- The main branch always remains stable
Notes on Git Concepts
- HEAD: Think of HEAD as a pointer to the current snapshot you’re working on. It usually points to the latest commit in your current branch.
 Visualization of the HEAD pointer
Pull Requests: A way to propose changes before they’re merged into the main codebase. It’s like saying “I’ve made these changes, please review them before accepting.”
- Force Push: Use with caution! This overwrites the remote repository with your local version. Only use when you’ve rewritten history locally:
1
git push --force origin branch-name - Keeping in Sync: Always keep your forked repository up to date with the original:
1
2
3
4
git fetch upstream
git checkout main
git merge upstream/main
git push origin main
Common Scenarios
Starting a New Project
1
2
3
4
5
6
7
8
9
10
11
# On GitHub: Create a new repository

# Locally:
mkdir my-project
cd my-project
git init
# Create some files
git add .
git commit -m "Initial commit"
git remote add origin https://github.com/username/my-project.git
git push -u origin main
Contributing to an Existing Project
1
2
3
4
5
6
7
8
9
10
11
12
# On GitHub: Fork the repository

# Locally:
git clone https://github.com/your-username/project-name.git
cd project-name
git remote add upstream https://github.com/original-owner/project-name.git
git checkout -b new-feature
# Make changes
git add .
git commit -m "Add new feature"
git push -u origin new-feature
# On GitHub: Create a Pull Request
Remember: Git is a powerful tool that becomes intuitive with practice. Start with the basics and gradually incorporate more advanced techniques as you grow comfortable.
 The Git learning journey: from basic commands to advanced workflows